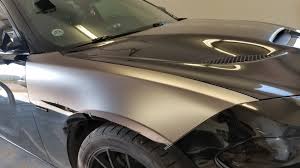
Tips for Perfectly Applying VViViD Vinyl Wrap

Applying VViViD Vinyl Wrap: Tips for a Flawless Finish
Vinyl wrapping is a fantastic way to give your vehicle a fresh, new look without the commitment and cost of a full paint job. VViViD Vinyl Wrap is a popular choice among car enthusiasts due to its durability and ease of use. However, achieving a flawless finish requires attention to detail and the right techniques. Here are some tips to help you perfectly apply VViViD Vinyl Wrap.
1. "Preparation is Key": Before you begin, ensure that the surface of your vehicle is thoroughly cleaned and free from dirt, grease, and any imperfections. Use a good quality car wash soap and a microfiber cloth to clean the surface. For stubborn spots, consider using isopropyl alcohol to remove any residue. A clean surface ensures better adhesion and a smoother finish.
2. "Gather the Right Tools": Having the right tools on hand can make the application process much easier. Essential tools include a heat gun or hair dryer, squeegee, utility knife, and a measuring tape. These tools will help you manipulate the vinyl and ensure a precise fit.
3. "Measure and Cut": Measure the area you plan to wrap carefully before cutting the vinyl. It’s always better to cut slightly larger than needed, as you can trim the excess later. This ensures that you have enough material to cover the intended area without stretching or distorting the vinyl.
4. "Apply with Care": Begin applying the vinyl from one edge, slowly working your way across the surface. Use your squeegee to press the vinyl onto the surface, working out any air bubbles as you go. Apply even pressure to avoid creases and wrinkles.
5. "Use Heat Wisely": A heat gun or hair dryer is invaluable for making the vinyl more pliable, especially around curves and edges. Apply gentle heat to soften the vinyl, allowing it to conform to complex shapes more easily. Be cautious not to overheat, as this can damage the vinyl.
6. "Trim Excess Vinyl": Once the vinyl is applied, use a utility knife to carefully trim away any excess material. Be sure to leave a small margin around edges for a clean finish. Take your time with this step to avoid cutting too much and exposing the surface underneath.
7. "Seal the Edges": To ensure longevity and prevent peeling, seal the edges of the vinyl with edge sealer or by gently heating and pressing down the edges with your squeegee.
8. "Final Inspection": After application, inspect your work for any bubbles or imperfections. Use your squeegee or a pin to gently release trapped air bubbles, and apply heat as needed to smooth out any remaining wrinkles.(Hexis Vinyl Wraps)
By following these tips, you can achieve a professional-looking finish with VViViD Vinyl Wrap that enhances your vehicle’s appearance and protects its surface. With patience and practice, vinyl wrapping can be a rewarding DIY project that transforms your vehicle into a personalized masterpiece.
- The Allure of FlexiShield Car Wrap: A Visual Guide
- The Elegance of Hexis Vinyl Wraps: A New Trend
- Transform Your Ride with KPMF Vinyl Wraps - KPMF Vinyl Wraps Shop | www.vinylcarwrapshop.com
- The Versatility of Orafol Vehicle Wraps in Customization
- Applying VViViD Vinyl Wrap: Tips for a Flawless Finish